Feeds:
Posts
Comments

Archive for the ‘Recipes’ Category

Has it really been 5 months since I wrote a post? Needless to say, like everyone else I’ve been busy!

Since my last communication I have

  • Taken and passed my Wine exam with a distinction
  • Sat through the Leiths diploma theory exam and stood through a 5 hour practical and passed!
  • Enjoyed a lovely long weekend with my family on the outskirts of Rome
  • Spent a month taking in the sights, hospitality and divine food of Hong Kong, Cambodia and Vietnam
  • Fed nine hungry golfers for a week at a gorgeous villa in the hills of Catalunya
  • Worked freelance for various catering companies
  • Baked an enormous and rather delicious chocolate cake for a 50th birthday party
  • Run my first independent canape and bowl food events to great success

So whats’ next?

You might remember my post: Lessons from work experience as I considered my options post Leiths. One of the greatest things about a life in food is that it is constantly evolving, you can never stop learning new styles, techniques and recipes, from yourself and from others. I wanted to do something I loved and to be my own boss so I have taken the first steps to setting up my own catering and events business. Details of what I will be doing will follow, and cookery classes are comings soon. But in the meantime here is a recipe (especially for Hayley) that makes use of a fabulous ingredient currently in season: Fennel

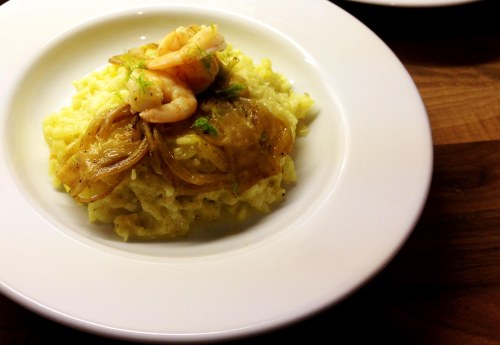
Fennel and lemon risotto with prawns
Serves 2

1 fennel bulb
2 tbsp olive oil
2 tbsp butter, plus 1 tbsp to finish
1 onion, finely chopped
180g risotto rice
1 large glass of white wine or vermouth
600ml vegetable stock
zest of 1 lemon, and juice to taste
25g parmesan, grated
6 peeled, raw large prawns

Finely chop the onion. Trim any green fronds from the fennel bulb and reserve for a garnish. Cut the fennel bulb in half and thinly slice three slices from each side using a mandolin or sharp knife. Finely chop the remaining fennel.

Very gently simmer the stock. In a separate pan gently sweat the chopped onion and fennel in olive oil until soft and translucent. Add the rice and stir until coated in oil. Turn the heat up and add the wine or vermouth. Stir until evaporated. Turn the heat down and add a ladleful of stock, stir from time to time until it has reduced. Repeat until the rice is al dente (has a slight bite). You may not need to use all of the stock.

Meanwhile, melt 2 tablespoons of butter in a frying pan and add the fennel slices. Cook until golden and then gently flip over. Add a ladleful of stock and allow to simmer until the stock has evaporated and the fennel is soft and golden.

Devein the prawns, make a shallow cut along the length of the black line and lift the intestinal tract out using the tip of a knife.

When the risotto is al dente, add the zest, butter and parmesan. Season to taste. If you would like a more lemony flavour, add some lemon juice. Cover  the pan and leave for 5 minutes while you cook the prawns.

Push the fennel slices over to one side of the pan. Turn the heat up and fry the prawns on each side until pink.

Spoon the risotto into bowls, top with  three fennel slices, three prawns and the fennel fronds.

p.s apologies to any followers that received an earlier email notifying them of a new but only half written post. The new changes (probably not so new anymore) to wordpress temporarily confused me!
Read Full Post »

Quite a few weeks seem to have passed since my last post. I’m not entirely sure where the time has gone except to say it has been rammed packed. Week 7 started with our first full day in the kitchen. Seven hours baking delicious Chelsea buns, making pate sucree and creme patisserie for individual fruit tarts, steak with Bearnaise sauce, rosti potato and tenderstem broccoli and espagnole sauce ready for a madeira sauce to go with rose veal the following day. It was tiring and my feet ached by the end of it but it was great to be in the kitchen for the whole day and get more of a taste for what it will really be like.

We have had the opportunity to flex our creative muscles where a little like Masterchef we are presented with a load of ingredients to turn into a culinary masterpiece but, unlike Masterchef we have days rather than 20 minutes to think about what we are going to do. In creative lamb I cooked lamb steaks marinated in Chermoula, a butterbean and caramelised onion puree, roasted red peppers and wilted spinach which was described as a very flavoursome plate (whoop!). I didn’t have the chance to take a photo but next time I cook it I shall post my recipe.

What I have photographed is my genoise commune cake smothered in coffee buttercream.

But this is no ordinary butter cream. For this very smooth, rich and exceptionally buttery butter cream, a creme anglais is made which is then mixed with butter and flavoured with coffee, chocolate or whatever takes your fancy. It’s a lot more faff that an ordinary butter cream but the smooth result justifies the extra effort for a special cake.

The birthday boy certainly enjoyed it!

Leiths Coffee buttercream

170g sugar
225ml milk
3 egg yolks
170g salted butter
170g unsalted butter
coffee essence to taste

Gently bring the milk and half the sugar to the boil.

Beat the egg yolks with the remaining sugar.

When the milk has come to the boil, pour it on to the egg mixture and mix well. Return the mixture to the saucepan and stir over a low heat without boiling until slightly thickened. To test it has reached the correct consistency, coat the back of a wooden spoon with the mixture and run your finger up the back. If you rock the spoon from side to side the line should remain. Once thickened strain into a bowl and leave to cool.

Beat the butter until creamy and gradually whisk the custard mixture in to it. Flavour with coffee essence

Read Full Post »

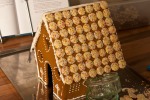
I had so much fun making this gingerbread house with the architectural expertise of Mr W. From mixing the gingerbread to icing and assembling, and finally, seeing the grin on our two year old goddaughters face when she saw it!

The gingerbread mix is from the BBC Good Food website and it behaved perfectly when baking, however, you do have to work quickly with it as it becomes crumbly, so make sure your baking sheets and templates are prepared in advance. I upped the spices to give it a bit more of a ginger kick and a hint of warming spices. There was plenty left over to make Christmas trees and stars for stocking fillers.

The  royal icing was left over from icing the Christmas cake and had been whisked to stiff peaks so it was nice and thick and stayed where I put it. It also gave me a chance to practice my new found piping skills.

Finding brightly coloured boiled sweets at the local newsagents and supermarket proved a bit of a challenge so the stain glass is not as bright as originally planned but overall I’m very pleased with the end result.  In fact, it turned out better than I could have hoped!

The gingerbread house was placed on a silver tray which was dusted all over with icing sugar. Trees were stuck to the tray with more royal icing, though a few blocks of mini toblerone were required to help it stay in place while setting. Inside the house was a gingerbread tree decorated with green icing, surrounded by marzipan presents.

I’m entering my Gingerbread House into the Great British Baking Club December Challenge

Fingers crossed!

Gingerbread

250g butter
200g light soft brown sugar
105ml golden syrup
600g plain flour
2 tsp bicarbonate of soda
11/2 tbsp ground ginger
1 tsp ground cinnamon
1 tsp ground mixed spice

Heat the oven to 200 degrees. Cut out 3 sheets of baking paper to fit your largest baking tray.

Melt the butter with the sugar and syrup in a saucepan over a low heat.

Sift the dry ingredients together into a large bowl and make a well in the centre. Pour the butter mixture into the well and quickly bring together with a wooden spoon to make a dough.

Take about 1/4 of the dough (cover the rest with clingfilm to prevent it from drying out) and roll out to the thickness of a £1 coin. Lay the two roof panel templates on the dough and cut round with a knife. A metal ruler will help you gain straight edges. Stamp out trees, stars or any other shape that takes your fancy into the dough around the edges.

Remove the excess dough from around the cut outs and remove the templates. Lift the baking paper with the cut outs on it on to the baking sheet. Bake in the top of the oven for 8 minutes or until golden brown (your oven may vary, the original recipe for this mix suggested 12 minutes, you may wish to do some tester biscuits first – chef’s perk :)).

Repeat with the walls and side panels. If you wish to create stain glass windows. Cut out your shape, remove the dough and fill with crushed boiled sweets.

Allow the gingerbread to cool and harden before placing on a wire rack. Once completely hardened and cool you are ready to decorate and then stick your house together with thick royal icing.


First pipe royal icing along the edges of the front wall panel and push the side panels into them. Repeat with the back panel. Support them with a big ball of icing wrapped in clingfilm or whatever you can find in your kitchen – in my case forks and ramekins worked well. Once hardened and set pipe along the top edges of the walls and put the wall panels in place. Support until set.

Pipe icing to create icicles and stick on any chocolate or sweets you wish to decorate your house with.

I think I might make this a Christmas tradition, it certainly seems more popular than Christmas cake.

Read Full Post »

Nearly three weeks ago I gave up work to give myself a bit of time to rest, catch up on those chores that never seem to get done and swot up on what has already been covered by my soon to be fellow students at cookery school. I thought I’d have plenty of time in which to get everything done and to post more regularly. Yet, I seem to have been busier than ever. After a longer than intended period between posts I give you a Christmas recipe that will give you the energy to get though the festivities.

Mr W and I started making our own granola years ago, chucking in whatever nuts, seeds and dried fruit we have in the cupboard. Friends and family often ask for the recipe and while there are some key ingredients the beauty of homemade granola is you can put in whatever you want.  You also know what is in your morning bowl of cereal. Have you looked at the obscene amount of sugar in breakfast cereals, even the good ones? If you don’t like walnuts leave them out. Don’t have any honey? Use golden or maple syrup or even black treacle. Adjust the sweetness according to your tastes.

It’s also really good for you giving you a slow energy release because of the oats, nuts and seeds. Inspired  by Ellie of Nutmegs, seven we recently replaced oil with pureed apple for an even healthier alternative. You don’t just have to save it for breakfast. It’s great on it’s own as a snack, over ice cream or in a crumble topping.

Cinnamon, cloves, ginger, nutmeg – all smells of Christmas. Well not just Christmas, I’ll happily use them all year round but having decided to make a Christmas inspired granola gift these warming spices seemed the most appropriate accompanied by orange and cranberries evoking fragrant memories of mulled wine and gingerbread. The ingredient list is pretty long but you can leave out or add whatever you like. I used three different syrups but one, or honey or brown sugar would work just as well.

Christmas Granola
makes about 2kg

600g porridge oats
100g golden linseeds
100g sunflower seeds
150g pumpkin seeds
150g sesame seeds
200g flaked almonds
100g hazelnuts
150g walnuts
100g desicated coconut
2 tbsp ground cinnamon
1 tsp ginger
1/4 tsp ground nutmeg
1/4 tsp ground cloves
1/8 tsp ground allspice
zest of 2 oranges
juice of 1 orange
200g pureed apple (cook an apple in a splash of water until it breaks down)
100ml maple syrup
50ml golden syrup
25ml ginger syrup from a jar of stemmed ginger
500g dried cranberries

Preheat the oven to 180 degrees.

In a large bowl, mix the oats, seeds, coconut, orange zest and spices together. Whisk the apple puree, orange juice and syrups together in a small bowl. Pour oven the oat and mix together. Hands really are best here.

Spread the granola over a shallow tray to depth of about 1 cm and bake for 30 minutes, stirring half way through until golden. For this amount you will need to do this in several batches unless you have an enormous oven.

Once cooled stir through the cranberries and store in an airtight container.

Read Full Post »

The demands of my stomach to try authentic cuisine from around the world often dictates holiday destinations so it was with no surprise that Mr W. and I travelled to Morocco to sample many of the culinary delights this country has to offer. Cinnamon, cardamon, cumin, ginger, apricots, dates, chermoula, mint tea, rosewater, saffron, ras el hanout, pastilla, tagine … the list of delicious ingredients, flavour combinations and dishes goes on and in my opinion – what is not to love! I wish I could say the same for the treatment of animals, the vast gap between rich and poor, and the almost aggressive insistence of some hawkers.
The aromatic scents that hit you at every turn are almost intoxicating and it is very difficult not to dine well (though a bout of two of food poisoning at some point is sadly to be expected). In the safety of my own kitchen Moroccan influenced flavours often appear in my cookery and no doubt, over time this influence will be felt in the content of this blog.

A traditional Moroccan meal begins with a delicious array of hot and cold salads, often accompanied with or followed by briouats, little triangular or cylindrical parcels of meat, seafood or cheese wrapped in warqa, a paper-thin Moroccan dough. Whenever I have a dinner party with a Moroccan influence I like to serve some of these little parcels. Favourites include butternut squash, spinach, pinenuts and cinnamon but it is this filling that is always the surprise success of the evening.  I caution now that this version is not authentic, I use filo pastry for starters rather than warqa, spring wrappers would be another alternative. This particular recipe uses smoked mackerel and I’m not sure you would find this particular combination in a traditional Moroccan restaurant or kitchen. The combination of Moroccan spices, sultanas, pinenuts and corriander create a delicious and moreish snack that have so far had my guests coming back for more, I’ve yet to find someone who doesn’t like them.

Adapted from a recipe in a Waitrose magazine.

makes 10

150g smoked peppered mackerel, skinned and flaked
1/2 red onion, finely chopped
25g sultanas
15g pinenuts
2tsp Ras el Hanout
1 clove garlic, crushed
zest of 1 lemon
1 tbsp chopped coriander
5 sheets of filo pastry
2-3tbsp olive oil

Heat the oven to 200 degrees.

Heat 1/2 tablespoon of olive oil in a frying pan and saute the onion until soft. Add the flaked mackerel, garlic, sultanas, pinenuts and Ras el Hanout and continue cooking for 1 minute. Transfer the mixture to a bowl and stir in the coriander and lemon zest.

Lay 5 sheets of filo pastry on the worktop and cut into 4 strips widthways. Take one strip and brush it with a little olive oil. Lay another strip on top. Place 1-11/2 teaspoons of the mackerel mixture in the top left corner of the strip and fold over to form a triangle. Continue folding in a triangle shape until you reach the end of the sheet. Repeat to make 10 parcels.

Place the parcels on a non stick baking tray and brush with a little oil. Bake for 20 minutes or until golden and crisp. Leave to cool on a wire rack for a few minutes before serving.

These parcels can be made in advance and reheated in the oven for 5 minutes, or they can be frozen for up to a month and baked from frozen for about 25 minutes.

Read Full Post »

Perfect Porridge

Porridge, king of the winter breakfast – filling, wholesome and insulating. Yet, a divider of people. No two recipes are the same. Do you add salt or sugar? Do you make is with milk, water, or a bit of both? Cook it for 5 or 30 minutes?

Whilst I get a little annoyed at his style of delivery I must admit a liking for many of Nigel Slater’s recipes and it was while catching up on an episode of Simple Cooking last week that I learnt how to make my perfect porridge. Not from Nigel Slater himself, but from Ian Bishop, a world porridge making champion!

I love porridge. When I was little it was a treat always and only made by my dad who adds a touch of nutmeg. I’ve always used a mixture of water and milk but this recipe uses water only and it is just as creamy if not more so. I never added salt -apparently a Scots thing – those that do, say that adding salt at the correct time is very important, yet a bit of internet research shows that few agree when this is. As instructed by Ian Bishop I added salt to my porridge when it began to boil and I do think it helps to bring out the flavour of the oats.

Both my dad and I always insist on topping our porridge with some cold milk. The contrast between steaming hot porridge and cool milk seems to bring out the creaminess of both the porridge and the milk and I love the texture the porridge takes on when the milk is added. This was not lost on Nigel or the porridge champion.

I was also surprised by how little time it took to cook compared with what I have been doing, which makes this a quick, easy and insulating breakfast for a cold day.

This recipe uses 1 part oats to 3 parts water. I always make my porridge using the same glass instead of weighing out the ingredients. This makes it even quicker to make when you are bleary eyed in the morning. However, I’ve added measurements according to the glass I use below.

Perfect Porridge (based on a recipe by Ian Bishop)

Serves 2

75 g porridge oats
500 ml cold water
1 tsp salt
1/2 tsp cinnamon
2 tsp honey
2 tsp of your favourite jam
cold milk

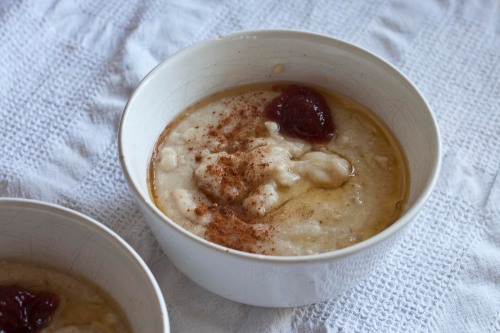
Pour the oats and water into a small pan and heat gently. As the porridge reaches boiling point and starts to ‘blurp’ add the salt. Gently stir for 5 minutes and it is ready.

Pour into 2 bowls, sprinkle over the cinnamon, a teaspoon each of honey and jam, and top with a little cold milk.

The amount of cinnamon, honey and jam suit my tastes though this tends to vary from morning to morning. Experiment according to your tastes. Play with flavours, omit the jam, add nutmeg instead of cinnamon, one of my favourites and definitely a healthier start to the day is sultanas and mashed banana. Top with a fruit compote, use brown sugar or golden syrup instead of honey. Breakfast will never be boring.

Read Full Post »

When I found out about the Tea Time Treats challenge hosted by Lavender and Lovage and What Kate Baked I had to enter. This months challenge is hosted by Karen at Lavender & Lovage.

The theme is ‘bonfire’ and ‘ginger’ which immediately conjured up images of flames in my head. I just had to think about how I could create an edible bonfire.

I have always loved bonfire night. The whizz, bang, pop of the fireworks, the oohs and ahhs of the crowd, the way the smoke drifts across the sky and the smell of gunpowder. It’s one of my favouritist smells… ever! After the excitement of the firework show comes the rush to the bonfire to warm your hands and feet. Then the rapid retreat as your face stings with the heat.

I always associate butternut squash soup with bonfire night so this challenge presented the perfect opportunity to create a bonfire themed tea time treat using butternut squash which I’ve been wanting to do for a while. The colours are perfect. Butternut squash cake, pumpkin pie and pumpkin meringue pie were considered before I settled on cheesecake. But while the colour was ideal, how was I going to make it look like a bonfire?

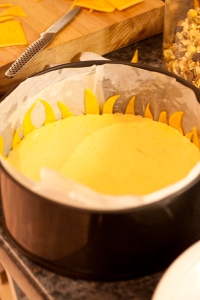
I started by cutting flame shapes in very thinly slice butternut squash and edging the tin with it so that is cooked as the cheesecake baked.

When I took it out of the oven the tops had chared a little and started to curl which looked really effective. The areas of squash that touched the cheesecake however, had not coloured but while you could omit this stage, I still think it adds to the overall effect.

I decided more flames were needed and I wanted them to be crisper, adding a further texture. Caramelised slices of butternut squash worked really well as the colours developed giving a mottled effect reminiscent of flames. Smaller flames were gently pressed into the edge of the cheesecake and larger ones were arranged on top in the middle. I’m pretty pleased with the effect, not so with the photography. The cheesecake had been burning away at us for over 24 hours at that point so it was a case of gobble first, think later.

It was delicious! You would not necessarily be able to identify the presence of butternut squash but it adds its own unique rich sweetness, almost like caramel without being too sweet. It was complemented perfectly by the warm spices. My testers gave it 10 out of 10 and have demanded I make it again.

I accidently picked up a tub of light cream cheese as well as one of full fat so ended up using 300g of light and 150g full-fat to no detriment, so you can feel slightly healthy eating this cheesecake. Well that’s what I told myself as I went back for my third slice.

Serves 8 – 12 (honest)

200g ginger biscuits
50g butter, melted
350g butternut squash which should yield 155g pureed (or use tinned pumpkin puree) plus extra for ‘flames’
2 tbsp double cream
450g cream cheese
1 egg
1 egg yolk
8 tbsp icing sugar
1 tsp ground cinnamon
1/2 tsp nutmeg, freshly grated
pinch ground ginger
pinch ground cloves

Heat the oven to 18o degrees. Chop the bottom end of the butternut squash off, cut into quarters and remove the seeds. Lay flesh side down in a roasting tin. Bake in the oven for 30 minutes until soft. Remove from the oven and leave to cool.

Grease an 8 inch springform tin with butter. Line the bottom and sides with baking paper.

Place the ginger biscuits in a plastic bag and bash with a rolling pin until they resemble breadcrumbs. Pour into a bowl and mix with the melted butter until it all comes together. Press the biscuit crumbs into the tin base and chill in the fridge for 10 minutes, then bake for 10 minutes and leave to cool.

Turn the oven down to 150 degrees.

Peel the skin away from the butternut squash flesh. You need 155g of the the flesh. Puree in a liquidiser with the double cream.

Beat the cream cheese until smooth and stir in the icing sugar and spices. Gradually add the egg and egg yolk until fully incorporated. Add the puree. Taste and add more sugar or spices as necessary.

Optional: Brush the baking paper that lines the sides of the tin with butter using a pastry brush. Gently press half of the smaller flames (for method see below) around the edges of the tin so that they go all the way round.

Pour the cream cheese mixture into the tin and bake in the lower half of the oven for 30-40 minutes until it is set. Leave the cheesecake to cool in the oven. This is to stop the top from cracking. Chill overnight in the fridge.

30 minutes before serving, remove the cheesecake from the fridge. Remove from the tin and very gently peel away the baking paper. Gently press the small caramelised flames on to the sides so that they overlap. Make a bonfire with the larger flames in the middle of the cheesecake.

To make the flames:
Heat the oven to 110 degrees. Using a mandoline or very sharp knife, slice the stem end of the butternut squash very thinly. Using a small knife cut 10 -12 large flames about 5cm wide at the base and 8cm high. Cut some smaller flame shapes about 2cm wide at the base and 4cm high. You will need enough to go around the tin twice – about 6 slices depending on the size of your squash. Half of the small flames are used to line the tin.

Place the large flames and the remaining small flames on a baking sheet lined with baking paper. Sprinkle generously with caster sugar and bake for 1 hour.

Leave to cool on a wire rack and transfer to an airtight container.

Read Full Post »

A long busy day at work,  the wind was picking up and the temperature had dropped. I needed comfort grub of the quick variety.

Do you remember those egg adverts a few years ago where people were faced with an ’empty’ fridge yet eggs came to the rescue? This was one of those moments. The cupboards were almost bare due to an enforced eat up week (got to save some pennies somehow) but lurking in the fridge were a couple of leeks, a little pot of double cream, some strong vintage cheddar and a box of eggs.

serves 4 for a light lunch/supper, or 2 greedy piggies

1 tbsp olive oil
about 250g leeks
freshly grated nutmeg
4 good handfuls of finely grated cheddar cheese (the stronger the better)
4 eggs*
6-7 tbsp (90-105ml) cream
salt and pepper

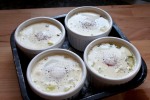
Preheat the oven to 190 degrees. Butter 4 ramekins and place in a roasting tin.

Heat the olive oil in a small frying pan.  Wash the leeks – I find it easier to get the dirt out by slicing them length ways first – and slice thinly. Gently fry the leeks until soft. Add a grating of nugmeg, 2 handfuls of cheese and 3 tablespoons of cream. Season and turn off the heat.

Divide the leek mixture between the ramekins. Break an egg into each and spoon up to a tablespoon of cream over each egg. Sprinkle over the remaining cheese and season with freshly ground black pepper.

Pour boiling water into the roasting tin so it comes half way up the sides of the ramekins. Place in oven for 10-12 minutes until the whites are set and the yokes are runny. Be careful, it is so easy to over cook them.

Serve with hot buttered toast.

*I confess to being a total egg snob. Until I have hens of my own, my egg of choice is the Burford Brown. I have been known to have a teeny tantrum in the supermarket when they have run out.

Read Full Post »

Blackberries are available in our supermarkets throughout the year and you may just find some British ones on the shelves throughout the summer. Sadly, the majority of them are tart and lacking in sweetness and fruity flavour. Come September and the hedgerows are laden with ripe blackberries ready for picking by people and birds alike. There is no better time to enjoy this delicious fruit and I tend not to eat it at any other time of year for fear of disappointment.

I was not organised enough this year to be ready in hand with tupperware and a non-white top at the point the blackberries reach plump and juicy ripeness but fortunately my parents were. On the hottest weekend in September, which has turned out to be our summer, they brought me some foraged blackberries and some deliciously sweet raspberries from their allotment. As they were beginning to go squishy and the temperature hit 28.5 degrees, a sorbet seemed an ideal celebration of our Indian summer.

Having thoroughly confused myself attempting to work out the correct ratio of berries to water and sugar using the Leiths method – I’m sure it will all become obvious when I get there – I turned to google for a sorbet recipe.  Most recipes are pretty similar but have slightly different methods. In addition to berries, the ingredients usually include water, sugar syrup, lemon juice, and occasionally alcohol or liquid glucose. Egg white can be added to prevent the formation of large ice crystals, slow the melt and give the sorbet a smoother texture. If you are adding egg white eat within 24 hours and do not feed to the young old, infirm or pregnant. I opted for a simple version and the result was refreshing and intensely flavoured. It could have been a little smoother, which is where an ice cream maker would come in handy.

I had a couple of egg whites that needed using up and this seemed the perfect opportunity to practice swiss meringues. Swiss meringues are made with twice the weight of caster sugar to egg white and are the simplest of the three types of crisp meringue, the others being Italian (made with a sugar syrup and more stable) and Meringue Cuite (made with icing sugar, finer, chalkier and even more stable).

#1 were crisp and chewy but wept a little sugar which according to the “what went wrong section” either means the oven was too high or they were overcooked. I’m slightly perplexed by this as they began weeping long before they were cooked. Maybe I should get an oven thermometer.

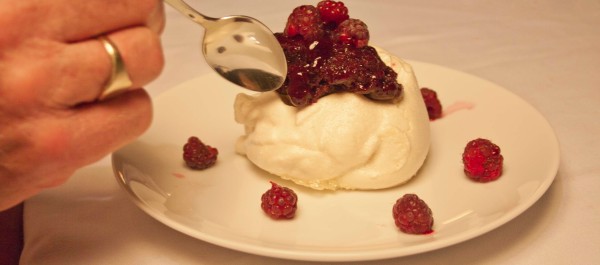
Served with raspberry and blackberry sorbet the meringues were the perfect end to our unexpected summer weather. Delicious!

Intense raspberry and blackberry sorbet

450 g of raspberries and blackberries
150g sugar
150ml water
juice of 2 lemons

Heat the water and sugar over a low heat and slowly bring to the boil. Simmer gently for 2 minutes until the sugar has dissolved. Remove from the heat and leave to cool. Pop the berries in a food processor and whizz to a puree. Strain through a sieve to remove the seeds and pour into a shallow container. Stir in the sugar syrup, then add the lemon juice to taste.

If you are lucky enough to have an ice cream maker, churn according to the manufacturers instructions. If not (and I’m not), place the sorbet in the freezer. Stir the frozen crystals that form around the edges with a fork every hour for four to five hours to break up the ice crystals and then leave to freeze completely.

Remove from the freezer 15 minutes before serving.

Swiss Meringues #2

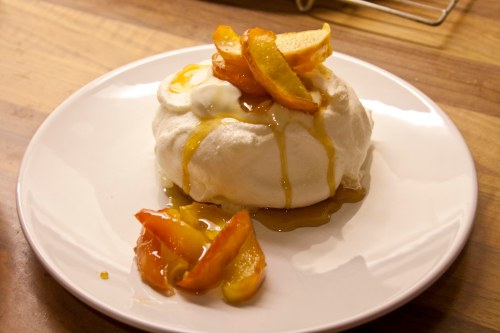
Fast forward a couple of weeks and the temperature has dropped by more than 10 degrees. I made swiss meringue #2 on a slightly damp day which may explain why the meringues absolutely refused to dry out even with extra cooking time – and still they wept sugar! Even so, they tasted rather lovely with greek yogurt and apples caramelised in brown sugar and a touch of lemon juice.

Resources:
BBC Food: Apple tart with blackberry sorbet
Woodlands.co.uk: Blackberry sorbet
Leiths Techniques Bible: Susan Spaull & Lucinda Bruce-Gardyne

Read Full Post »